How to turn on your iPhone’s screen recording feature

1. Open the Settings app on your iPhone.
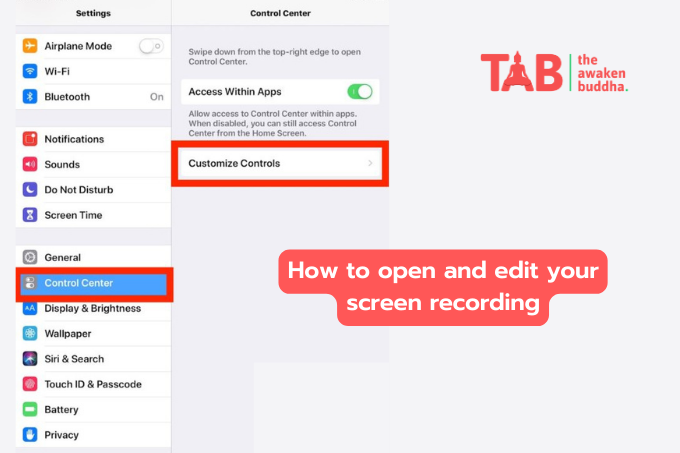
2. Scroll down and tap on Control Center.
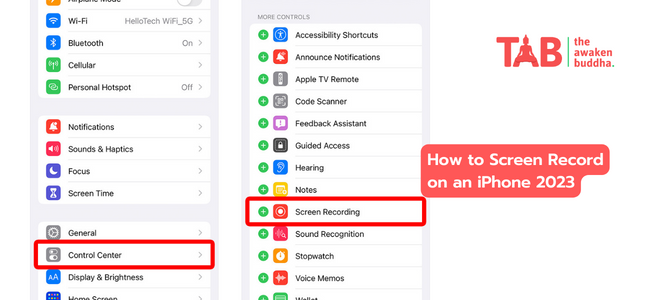
3. Tap on Customize Controls.
4. Scroll down and look for the Screen Recording option.
5. Tap the green plus icon next to the Screen Recording option to add it to your Control Center.
6. Close the Settings app.
7. Now, to use the screen recording feature:
8. Swipe down from the top right corner of your iPhone’s screen to open the Control Center.
9. Tap on the Screen Recording button, which looks like a circle surrounded by another circle.
10. A countdown timer will appear, giving you three seconds to prepare for the recording.
11. To stop the recording, tap the red status bar at the top of your screen and confirm that you want to stop.
12. The recording will be saved to your Photos app.
How to Screen Record on an iPhone
1.Open the Control Center by swiping down from the top-right corner of your iPhone’s screen if you’re using an iPhone with Face ID. If you’re using an iPhone with a Home button, swipe up from the bottom of the screen.
2. Tap the Screen Recording button, which looks like a circle surrounded by another circle. If you don’t see it, you may need to add it to the Control Center by going to Settings > Control Center > Customize Controls and tapping the green plus icon next to Screen Recording.
3. A countdown timer will appear, giving you three seconds to prepare for the recording. To stop the recording, tap the red status bar at the top of your screen and confirm that you want to stop.
4. Once you stop the recording, it will be saved to your Photos app. You can then edit and share the recording as you would any other video.
How to screen record with audio on an iPhone

1.Open the Control Center by swiping down from the top-right corner of your iPhone’s screen if you’re using an iPhone with Face ID. If you’re using an iPhone with a Home button, swipe up from the bottom of the screen.
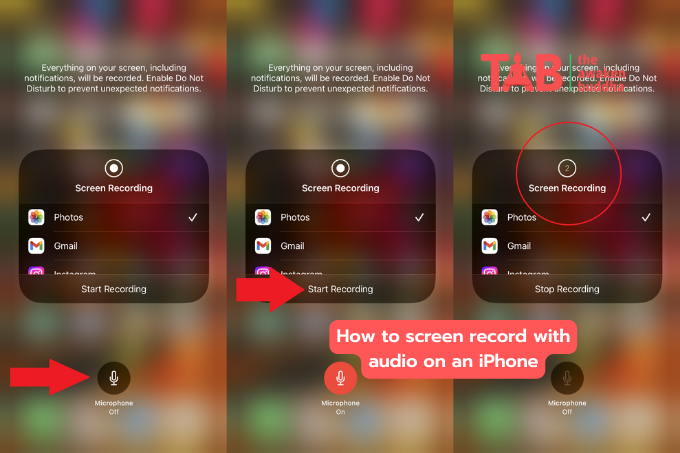
2. Press and hold the Screen Recording button, which looks like a circle surrounded by another circle.
3. Tap on the Microphone Audio button, which looks like a circle with lines inside it. This will turn on audio recording for your screen recording.
4. Tap Start Recording to begin the screen recording. You will see a three-second countdown timer.
5. To stop the recording, tap the red status bar at the top of your screen and confirm that you want to stop.
6. Once you stop the recording, it will be saved to your Photos app. You can then edit and share the recording as you would any other video.
How to open and edit your screen recording

1.Open the Control Center by swiping down from the top-right corner of your iPhone’s screen if you’re using an iPhone with Face ID. If you’re using an iPhone with a Home button, swipe up from the bottom of the screen.
2. Find the screen recording video that you want to edit and tap on it to open it.
3. Tap on the Edit button, which looks like three horizontal lines with circles on them.
4. Use the editing tools to make any desired changes to the video, such as trimming the length or adding filters.
5. Once you are done editing, tap on the Done button.
6. If you want to save the edited version as a new video, tap on Save as New Clip. Otherwise, tap on Save Video to replace the original video with the edited version.


